 Despite our best attempts to avoid printing information that we can access from our computers or smart devices, there’s going to be a time when you’ll need, or more likely someone else needs, to print out data from your Excel spreadsheet. Therefore, in this lesson I’ll cover the basics of what you need to know to start printing in Excel.
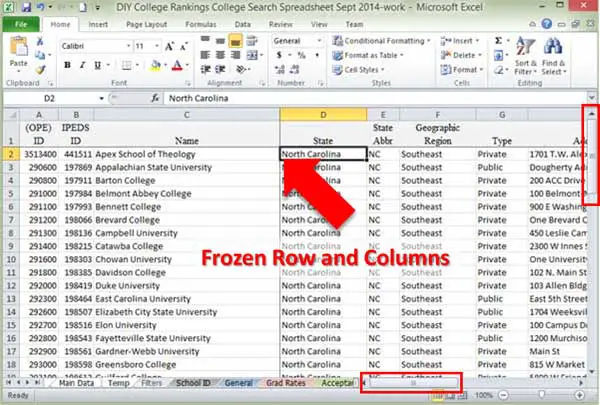
For this example, I created a new tab in my workbook called Temp. In the Filters tab of the DIY College Search Spreadsheet, I set the state filter for North Carolina to create a data sample to work with. I copied the data from the OPE ID column to the Zip Code column and pasted into the Temp tab making sure I had the same column widths.
You don’t have to use the same data selection as I did. You just need to have enough so that it won’t fit on a single piece of paper-legibly that is. In the example below you can see that there are both horizontal and vertical scroll bars since the data doesn’t fit in the window.
After copying the data to the Temp tab, I froze the top row and first three columns for convenience. The following example shows what my spreadsheet looks like.
Printing in Excel: Print Preview
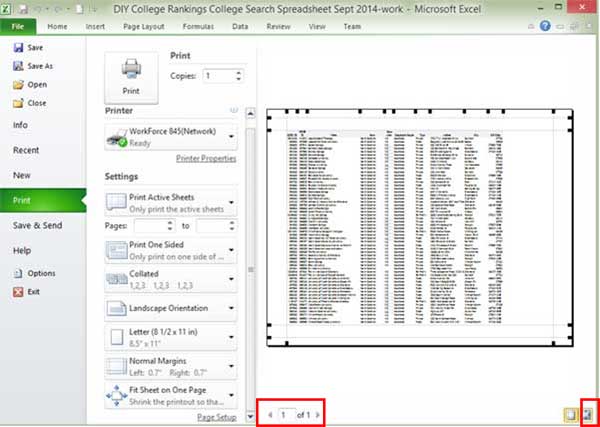
Once you have your sample data to work with, select the File menu option and then Print. If the Print Preview doesn’t automatically show up, click on the option on the right side of the window to open the preview.
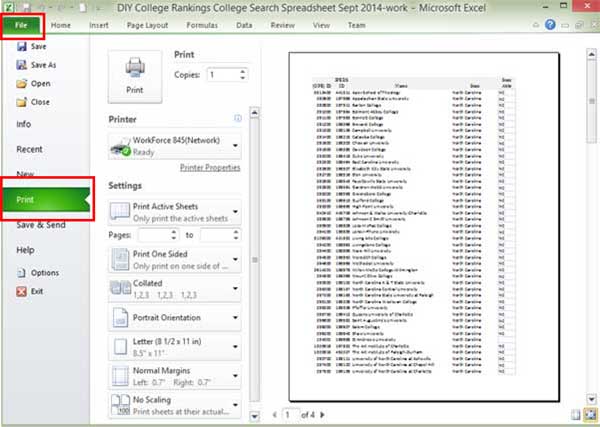
Under the Settings column, click on Print Active Sheets (1) in the following example. You may have some other option selects such as such as Print Selection, or Print Entire Workbook. In this case, select the existing option and change it to Print Active Sheets.

I’m not going to cover all of the options available for printing in Excel at this point but just a few to get through this example. When you actually print you’ll be selecting your printer under the Printer option (2). The Print Preview shows you all pages. You can page through them using the page numbers (3) or the scroll bars (4). Excel also provides you with the ability to see the entire page or zoom to actual size using the icons at (5).
Click on the left icon at (5) to zoom to the actual print size. Notice that the column titles currently appear in the Print Preview along with the school names. Excel is showing the first group of columns and rows that will fit on the page starting at the top left of the worksheet.

When you click to page 2 of the Print Preview, you still see the same column information, the ID columns and the school names, but you don’t see the column titles any more. Excel is printing the same columns but move down to the remaining rows to print on page 2.
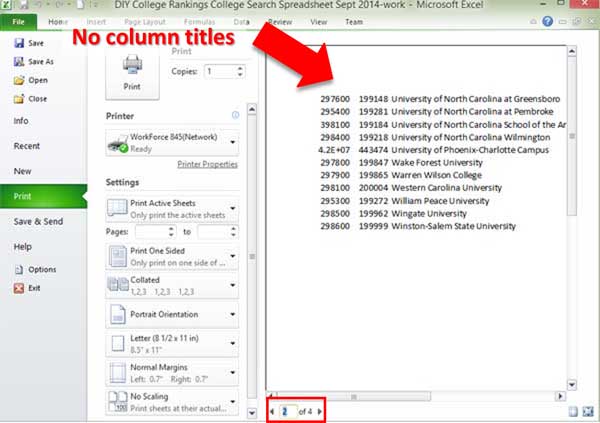
Move to page 3 and you’ll see that the column titles have returned but there isn’t any school identification information. Excel has move to the next set of columns to print starting at the top row.
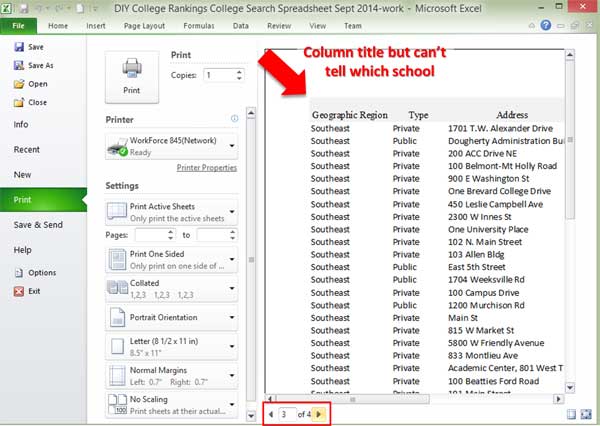
Once you get to page four, you don’t see any identifying information. Excel is printing the last of the rows and the remaining columns.

The information on page four is essentially useless since you don’t know which schools the data belong to.
Printing in Excel: Scaling
There are several ways to try formatting your data for printing to avoid situations like page four. The first is to try to scale the data to fit on just one page. Under the Setting options, click on No Scaling and select Fit Sheet on One Page.
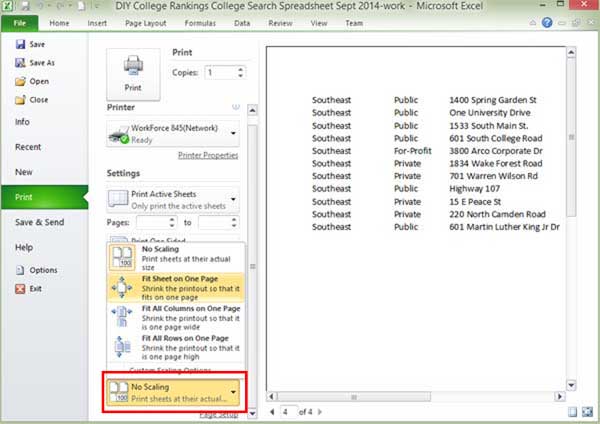
When you select this option, Excel will squeeze all of the data onto one page. You can use the print preview to see the actual size of the data and if it’s still legible.
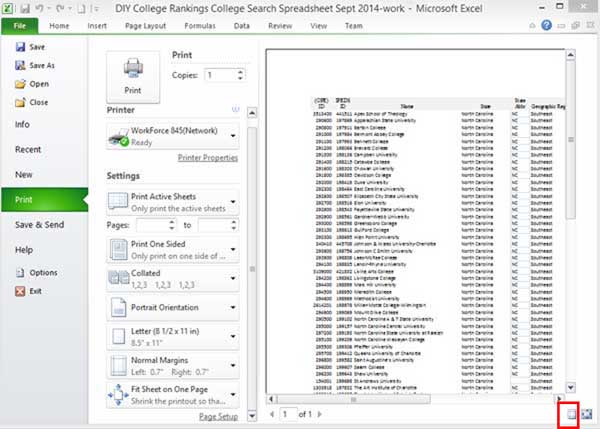
In this case, it’s not going to work. However, because of the layout of the data there’s a chance it will be legible if we change the orientation from Portrait to Landscape.
You can’t really tell from the example below but I would say that the changing to Portrait Orientation makes the data barely readable.
If you have no other options or must have everything on one page, this could work. But there are other options.
Printing in Excel: Titles
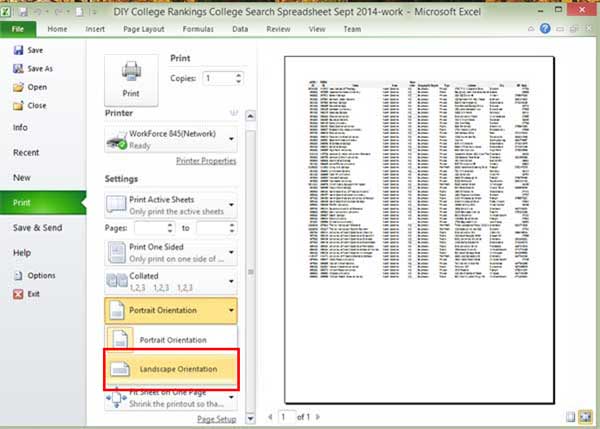
Select the Page Layout option from the Menu. This brings the data sheets back up and provides some more formatting options. Some of these options are the same as what we used in the Print menu. In the Page Settings section of the ribbon you see the Orientation options (1) that we just used on the Print menu.
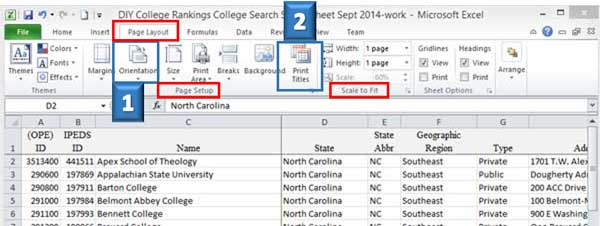
What we need to use now are the Print Titles option (2) under the Scale to Fit section of the menu ribbon. Select the Print Titles option and you’ll see the following:
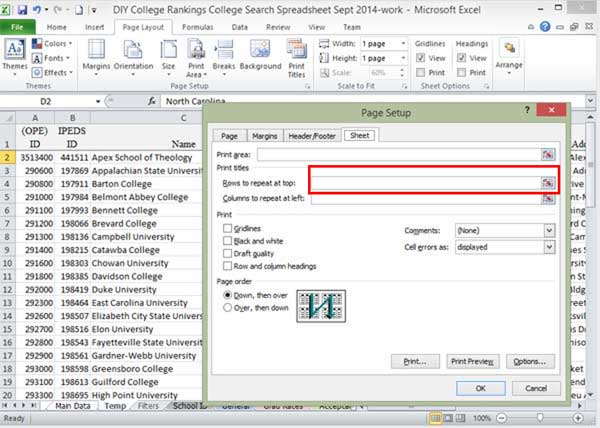
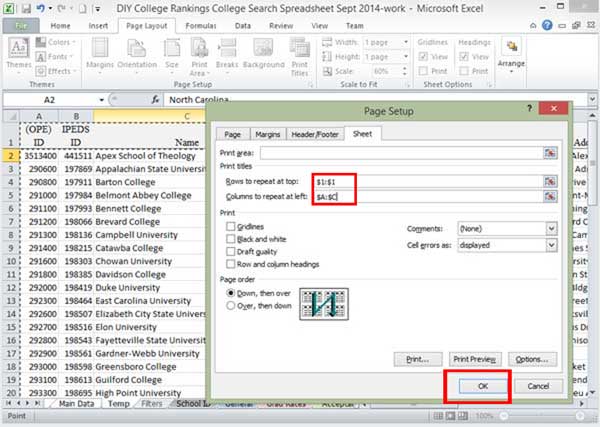
Excel opens a Page Setup dialog box. We want to set rows and columns to repeat so that we can identify the school and data even on page 4. First, select the Rows to repeat at the top by clicking on the table icon at the end of the data entry box.
You could enter the actual address of the cells you want to repeat. However, it’s easier to just select the row you want to use and Excel will automatically enter the address information in the box.
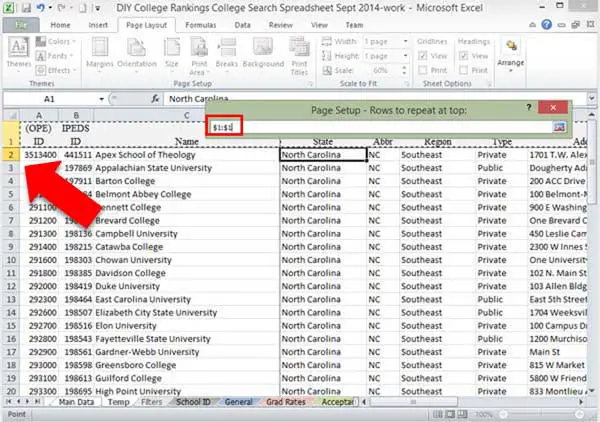
Once the information is entered, you can click on the return key or just close the window.
Now repeat the process for the Columns to repeat at the left. In the example, I select 3 columns so that I have the ID associated with each school available since some schools have the same name.
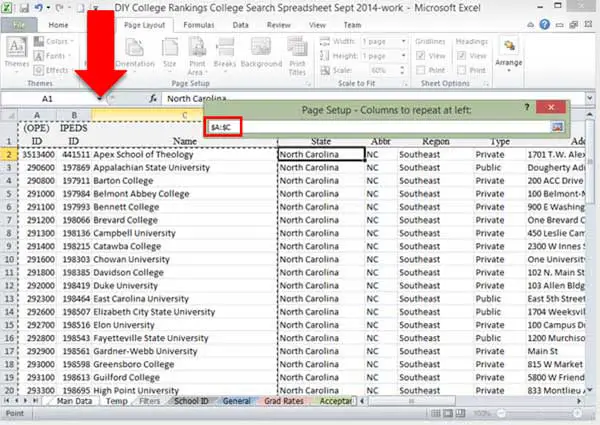
It’s actually more useful to repeat the state information with the school name but I wanted to keep this example simple.
When you return to the Page Setup dialog box, you’ll see that the information is entered for both rows and columns. Click on the OK button.
Return to the File menu, and select Print. Change the scaling option from Fit sheet on One Page to No Scaling.

In the Print Preview, you see that we’re back to four pages. Go ahead and preview page four. You should now see the column titles at the top and School Name and ID information repeated on the left. You now know what you’re looking at.

If you return to the Page Layout menu, you’ll see that Excel shows the Page Breaks. This allows you to resize columns to see if you can get a column or row to fit on a specific page or move it to the next.

There are many more ways to format your data for printing. What I showed you in this lesson are some basic options that should get you started with the process. I cover printing in more detail in the Using the DIY College Rankings Spreadsheet class which will start in February.
2 thoughts on “Creating College Lists 101: Introduction to Printing in Excel”